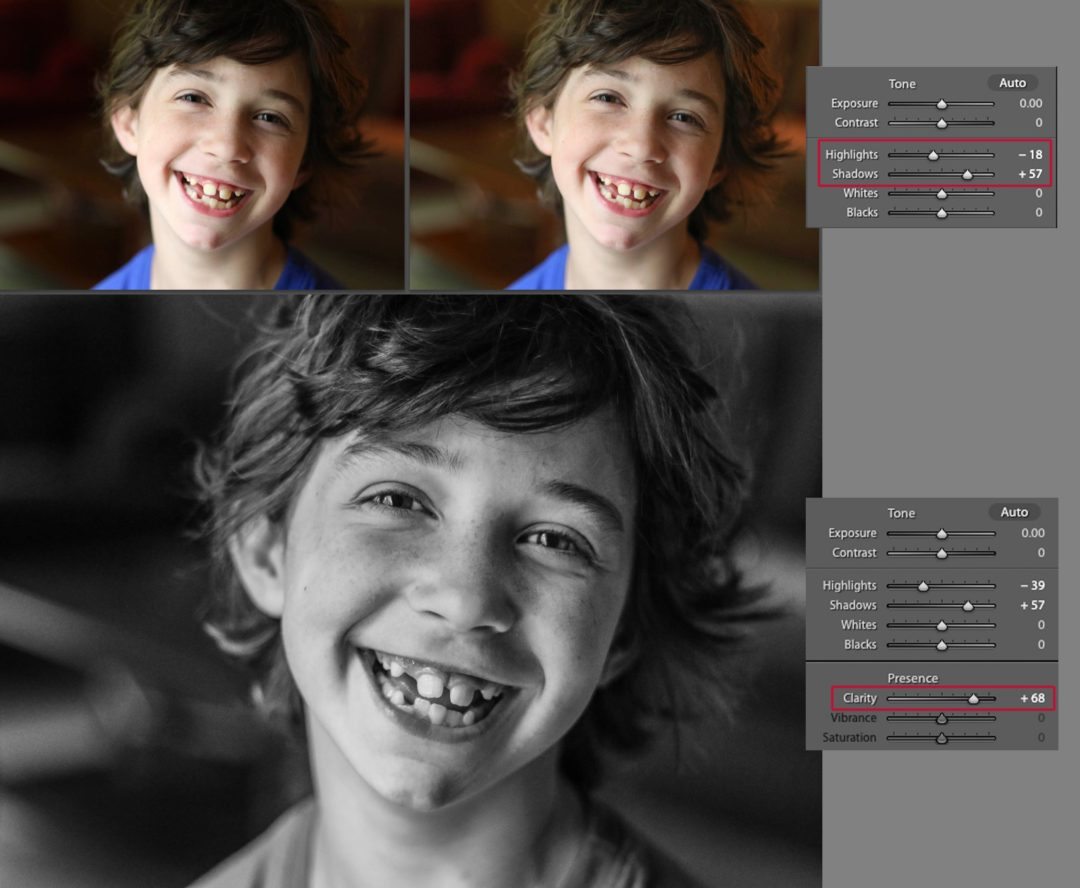
One of our Portraits and Lighting students posted the original photograph of her son at the top left. I always tell my portrait students to separate their subjects from the background and so I did a before and after as a demonstration. Step one was to brighten up the shadows and turn down the highlight a bit. That’s the picture at the top right. But then clarity did the rest of the work for me. I converted it to black and white and gave it a ton of snap, crackle, and top by increasing the clarity. Notice the difference in his hair between the first photograph and the last photograph. photo courtesy of Laura Donia
![]()
Virtually all the work we did there was in black and white. Making a gorgeous print—which could take several hours—often consisted of two things:
- Making sure the picture was not too dark or too light. That was the easy part.
- Making sure that it had the right amount of contrast. That was the tricky part.
Contrast, for those of you that don’t know, is the relationship of the blacks and the whites to each other.
- When you make the blacks blacker and the whites whiter you’ve increased contrast.
- When you make the blacks grayer and the whites grayer you’ve decreased contrast.
The most common way of increasing or decreasing contrast in a darkroom was to buy several different kinds of paper that had different contrast grades. It was not unusual to increase contrast so the overall image looked good but then you might have a specific area that went too dark. We would often go in with chemical bleach and fussy little paintbrushes or Q-tips to bring detail back to the areas that were too black; a tedious process, to be sure. For the areas that were too white, we had to add light using a piece of cardboard with a small hole in it to direct additional light to the “blown out” area. This was an art and a craft. Patience was require—lots of patience.
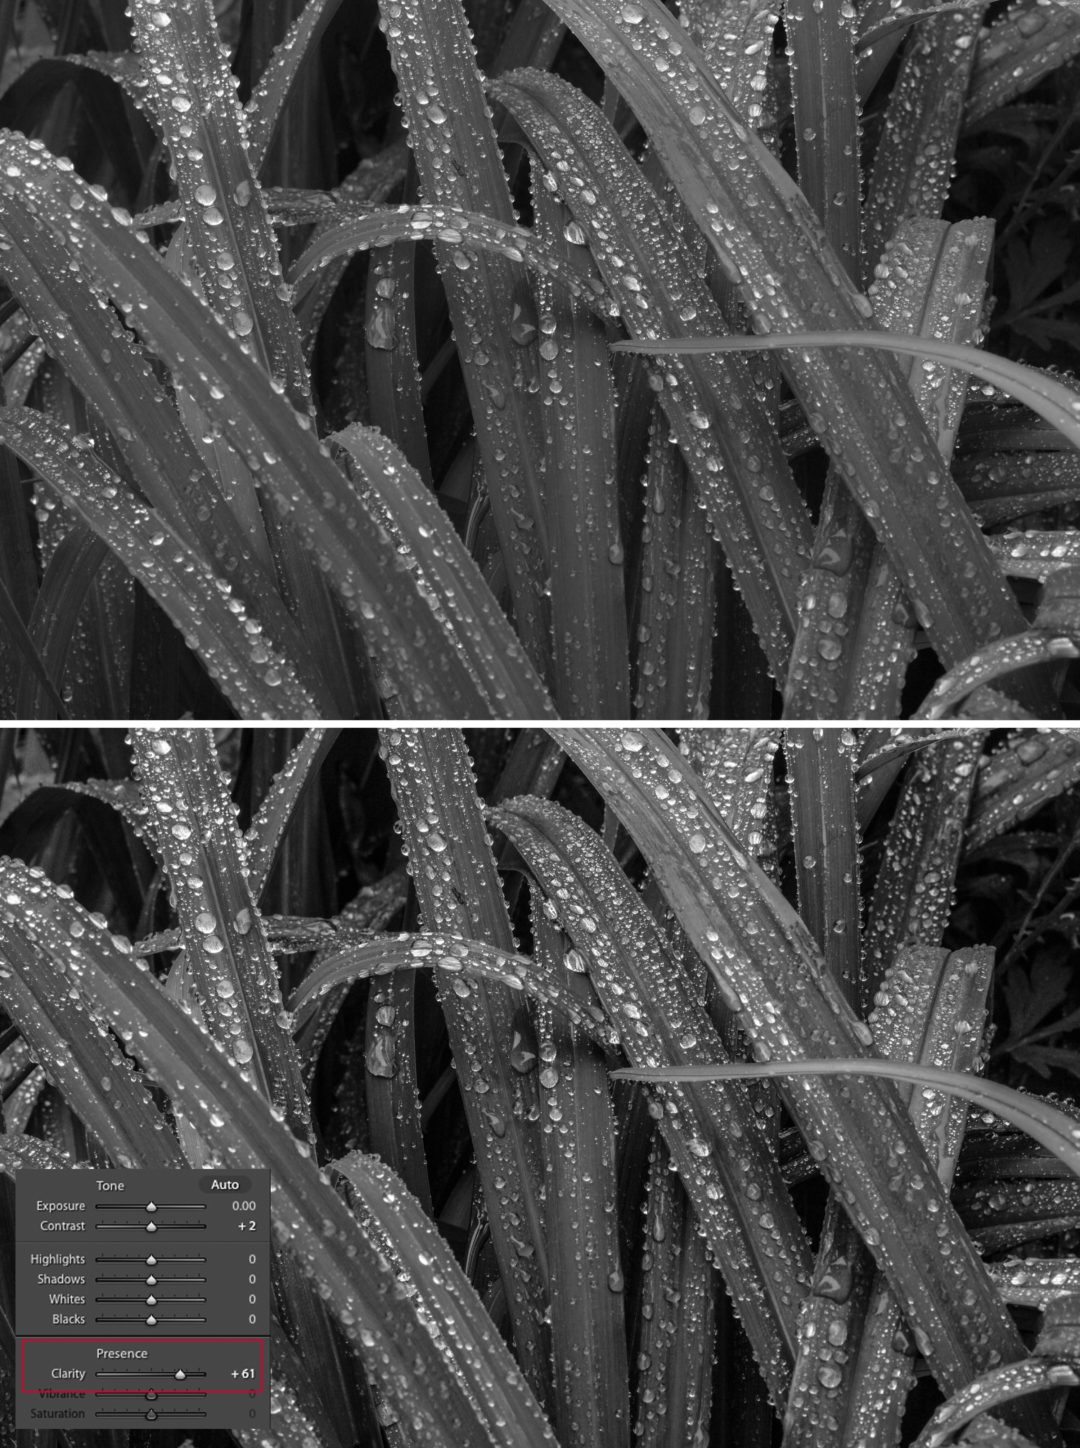
The difference between the top photograph and the bottom photograph is nothing but a increase of clarity. The contrast has been increased in just the middle tones—the gray tunes. The blacks and whites have essentially been left alone, just as it should be.
![]()
Enter the Clarity slider in Lightroom. Clarity increases contrast in the middle regions without affecting the blacks and the whites. It increase contrast only in the grayest parts of the photographs.
That’s exactly what I’d wanted to do all those long years and didn’t even know it. Now, if you asked me my very favorite feature on my favorite editing program, I would tell you it is the Clarity slider. (The Clarity slider is also in the Raw window in Photoshop and Photoshop Elements.)
Increasing contrast in the mid-regions means that you get to add snap, detail, and texture to an entire image without destroying detail in the blacks and the whites. The greatest photographers, Ansel Adams among them, built careers around holding detail in everything. When a photograph has detail everywhere it makes you think you can fall in an open window. It’s stunning. It makes the image appear three-dimensional.
Clarity is also a useful tool for reducing contrast. If you want to flatter a portrait subject you can REDUCE clarity and it reduces detail and snap and give the skin the glow you often see in make-up ads.
In my mind, the Clarity slide is worth the price of admission for using Lightroom.![]()
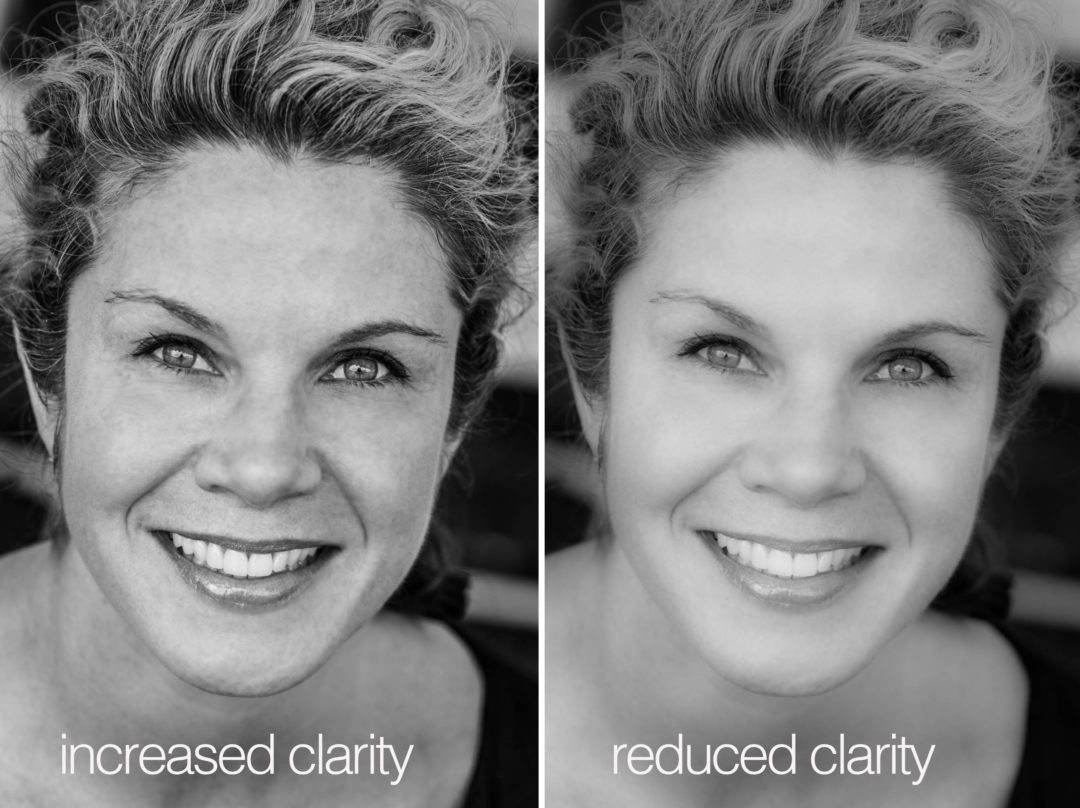
Clarity is also a two-way street. You can reduce clarity and diminish detail in the middle range. In this example, increased clarity gives an unflattering rough look to her complexion. By reducing the clarity she has the beautiful glow that everyone wishes they saw in the mirror.


I am one of those guys who spent hours in the darkroom. Dodging and burning was part of the journey, but density and contrast and resolution were Paramount.
Of course we all have to be “picky”about composition. After seeing these illustrations, I will be spending more time in the monochrome section of my computer, … I mean light room. Thank you for the explanation about clarity. It was and will be very useful!