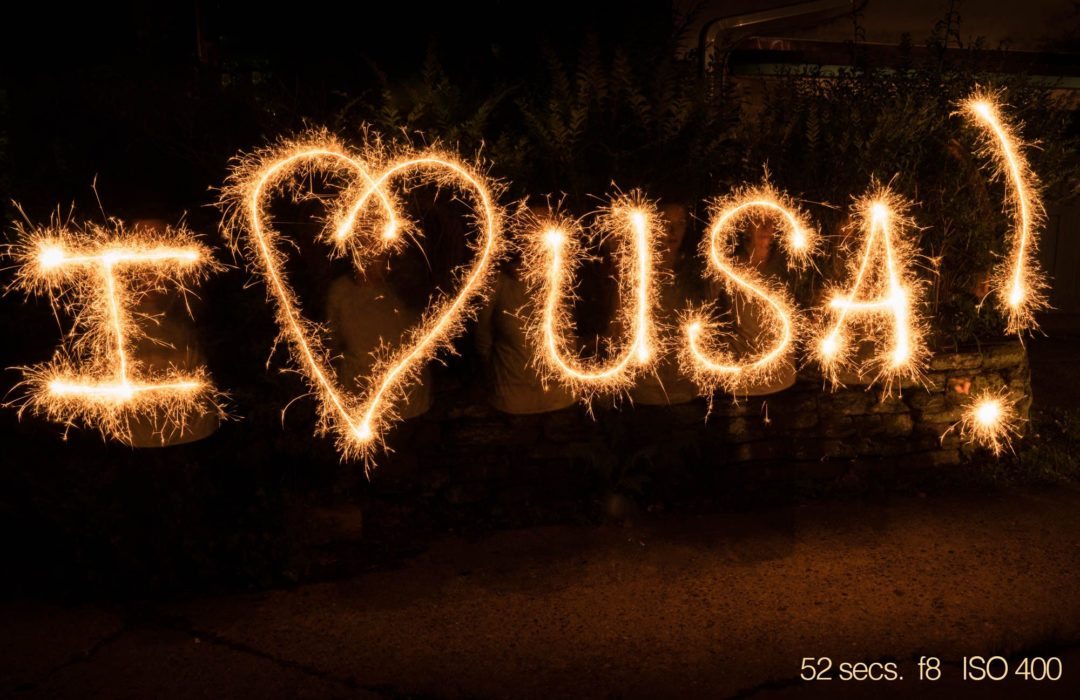
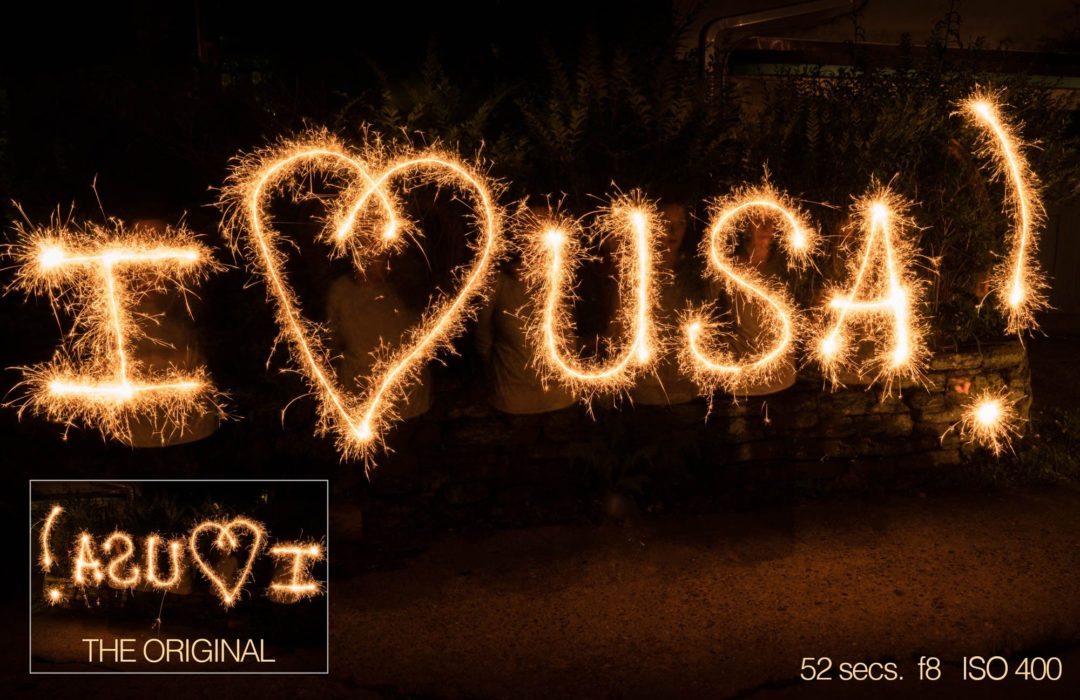
This was the most high production photograph I have ever shot for this blog. The explanation is at the end. Ask yourself how you would do this before you read it. Hint: It was done with one long exposure and one person holding the sparkler.
![]()
For all kinds of political, parental, practical, boring reasons the personal arsenal of fireworks I celebrated in my youth will not be enjoyed by my own children and the world will be better, significantly safer and duller for it. (We actually had firefights with bottle rockets. If you are now questioning my parents’ lack of judgement you are not alone.) But as long as I continue to breathe American air, the annual trip to the fireworks stand will stand as a Kelsh family tradition to be honored. Sparklers are here to stay and they always offer some incredible photographic possibilities. You can learn a lot by photographing fireworks.
Let’s assume that you want to take sharp, properly exposed photographs like the ones you see here. (I understand that out of focus random shots of blurred color can be appealing but that’s not what we’re talking about today.) So you’re going to need some preparation and an understanding of the whole process.
Here’s every little detail I can think of to help ensure that you succeed. It’s worth it. For many amateurs, pulling this off is one of the great thrills of learning to be a photographer.
(In the interest of full disclosure, the Kelsh boys were each paid two dollars to pose for the photographs you see here. I have found that incentive keeps their attention pinpoint sharp. When Alexander is saving up for a new Lego set he is especially vulnerable. I likely could have gained the same result with a pint of Häagen-Dazs. That’s six dollars—a two dollar savings!)
-
- The highest priority whenever you’re photographing fireworks is that no one gets hurt. Sparklers are incredibly hot. The center wire of a sparkler becomes red hot. Even after the sparkler is done burning it can burn human flesh. Everyone needs to wear shoes and everyone needs to know where the predesignated trashcan is for disposing of the wires immediately after the sparks die out. Any child who throws a wire on the ground doesn’t get ice cream.
- You’re going to shoot in manual exposure. Automatic exposure is not going to cut it here. Your camera has extremely long shutter speeds that some of you have never used—shutter speeds several seconds long. That’s what you’re going to use. I’m talking about four or eight SECONDS here, NOT 1/4th of a second and NOT 1/8th of a second. If you’ve never used camera shutter speeds that long, the time to figure this out is when you are sitting in a well lit living room all by yourself. Like all photographic things technically complicated, it’s important that you LEARN to use your camera before you USE your camera.
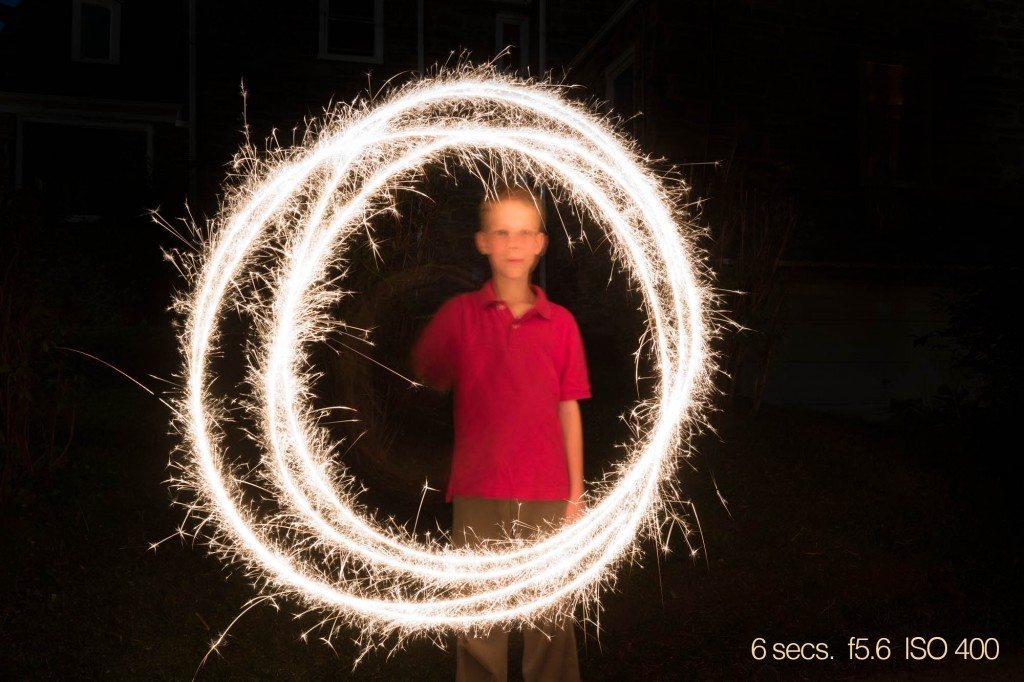
I shot several photographs of Alexander doing three revolutions of the sparkler and this was the sharpest his face ever was. I think this is about as good as it gets at six seconds.
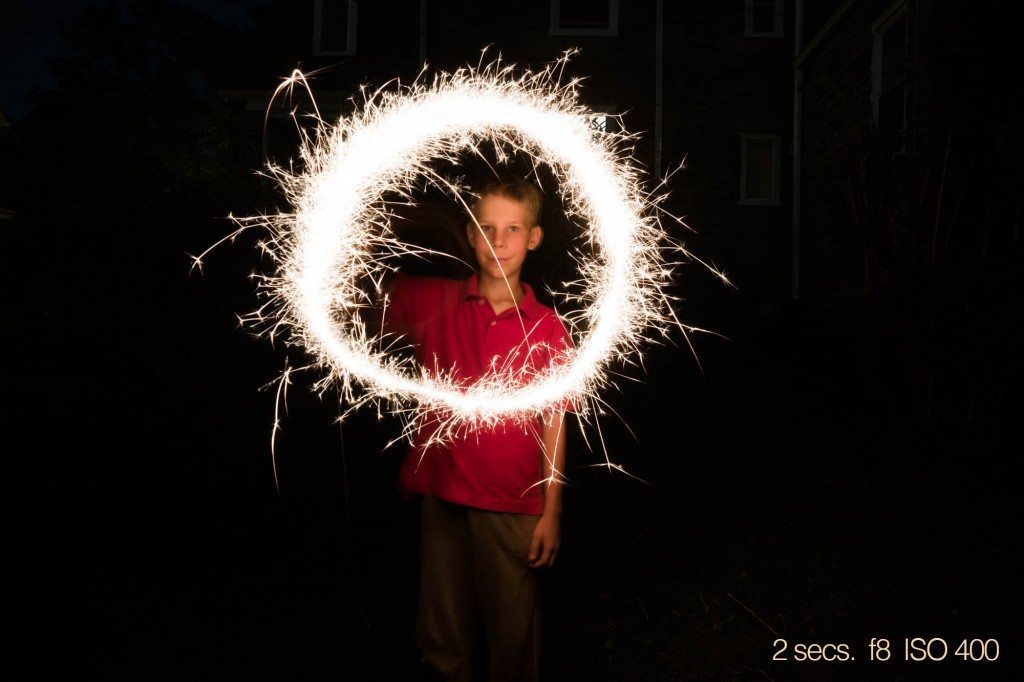
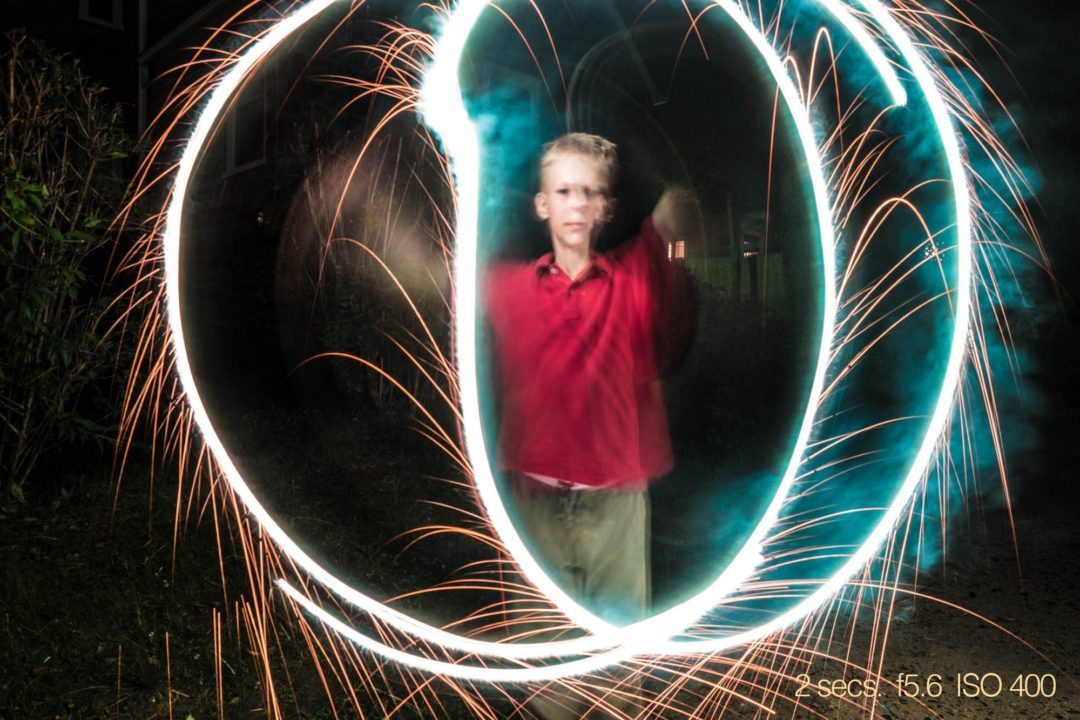
At two seconds, however, I took several reasonably sharp photographs. Alexander actually did a wonderful job of holding still but there was a big difference between two seconds and six seconds when it came to sharp faces.
- You’re going to want a tripod or at the very least, a way to completely stabilize your camera for the length of the shutter speed. That’s almost always a tripod. Having said that, people have brilliantly used beanbags or stacks of books or the hood of a car to rest their camera. You need to be extra careful with your camera if you are going to start balancing it on something in the dark especially if you’re doing this over pavement. The sound of a camera bouncing off pavement in the dark is a sickening sound at best, that’s the voice of experience talking. Honestly, there’s almost no substitute for a decent tripod when you’re photographing fireworks.
- You are going to manually focus your camera on the people holding the fireworks. This is different than manual exposure. Someplace on your camera you can turn off the autofocus. The problem is that you are now going to try and focus on people who are in the dark. That is where the next suggestion comes in.

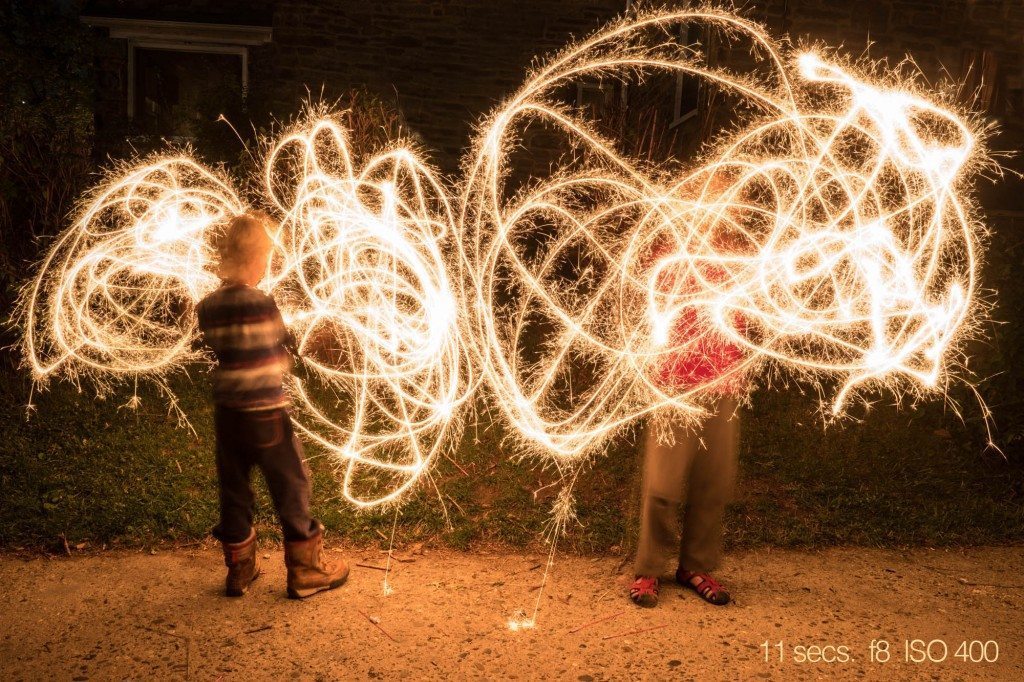
Chaos looks great in sparkler photographs and that’s a good thing—you’re going to get a lot of it. I told the boys to keep their feet in one spot and wave their arms about as much as they wanted to.
- You need a flashlight or even better, someone holding a flashlight for you. If you can have someone else shine a light on the subject’s face while you focus the camera manually life will be much simpler and your pictures will be better for it. In other words, having an assistant who can help you through this process is a big help.
- You don’t need to turn your ISO up to anything extreme. The actual sparks coming off of the sparkler are intensely bright. I suggest using ISO 400. To capture the motion of the sparkler you will be using a long shutter speed and that’s going to give you plenty of light.
- Set your aperture on f8. F8 is a nice middle of the road, Goldilocksy f-stop. Without getting too technical here, f8 also gives you a decent amount of depth of field. In other words, it will help ensure that your subjects remain in the field of focus. Your pictures are going to be sharper if you use F8.

The color variation here is the result of two different kinds of sparklers. I brightened Alexander considerably in my editing program, Lightroom.
- Understand that when you use long shutter speeds the people in the picture will likely be slightly and hopefully, pleasantly, blurred. If you are shooting at eight seconds they simply are not going to be sharp. However, the individual sparks coming off of the sparkler will be perfectly sharp and that is the look you’re trying to get.
- You will get better results if you find a reasonably dark place to do this. Traffic lights and house lights and streetlights will all be greatly exaggerated by the long exposures you’re going to use. Anything that’s white in the background is probably going to show up more than you want it to—white downspouts on houses come to mind. A nice dark little corner of the yard with some shrubbery in the background helps a lot.
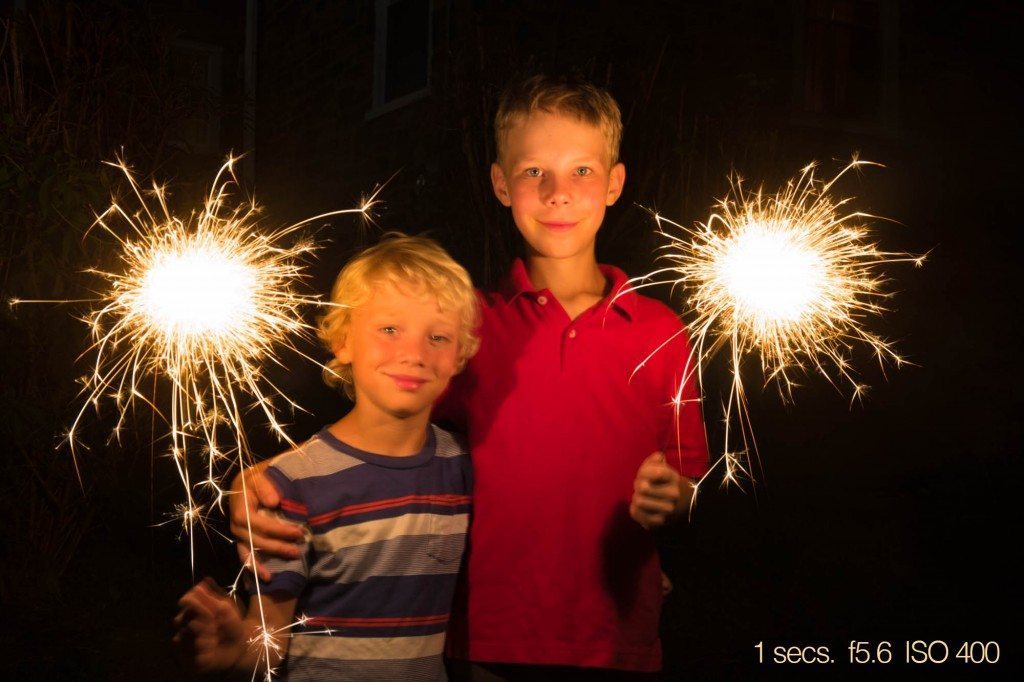
Getting two people to be sharp at the same time, however, proved to be much more difficult. Even at one second this was the sharpest frame I had. if you want to take sharp pictures of small groups you need cooperative subjects. Alexander, A+. Teddy, C-.
- If you’re going to try and take a sharp photograph of someone’s face as they’re twirling a sparkler they are going to have to hold really, really still. The fact is, it’s practically impossible for anyone to hold still while they’re waving their arm around in space so you need to have some patience and understand that perfection is just not going to happen here. Maybe the inevitable blur will be something that you find artsy and appealing. For your sake, I hope so.
- You need lots of sparklers. If you’re really going to have a sparkler photo session and produce results that you love you are probably going to need twice as many sparklers as you think. If you’re having a Fourth of July party with lots of kids over it would be well worth your while to have a dry run, dress rehearsal with one child the night before. I guarantee you are going to learn a lot about photographing sparklers and it will come in handy when the chaos begins. Extra sparklers means you’ve got more ammunition to practice with.

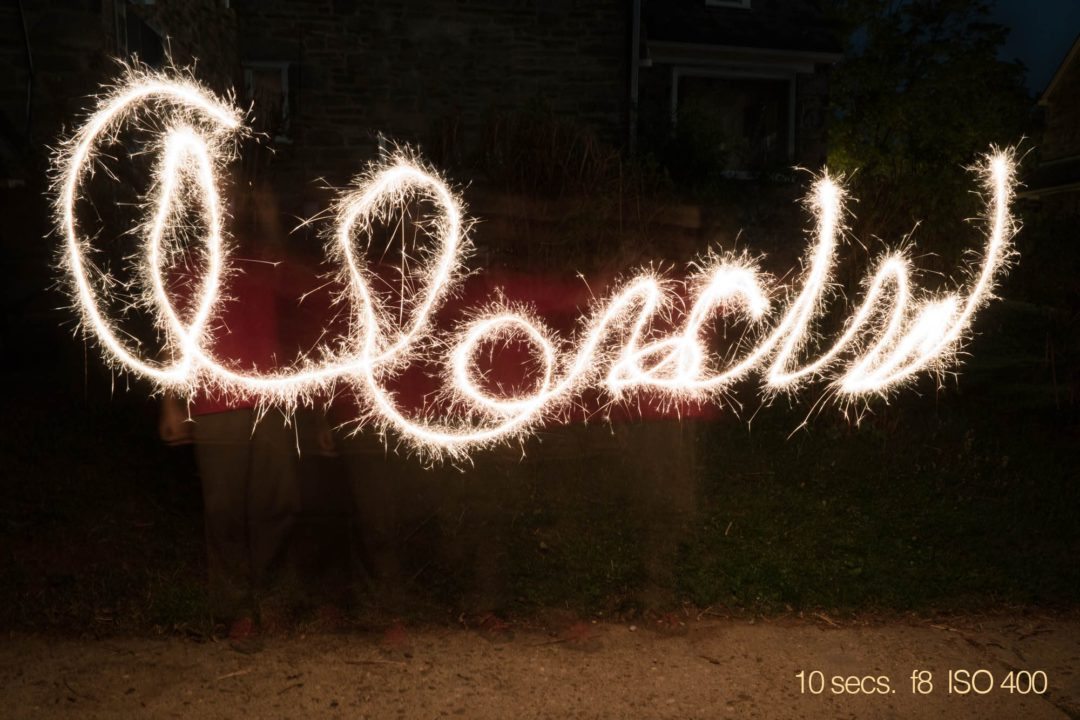
Maybe it’s just because I’m his father, but I can clearly read “Alexander”. This is one of the few times when it just would have been better to have named him “Tom”. This was the best of 10 attempts.
- Plan to play with your photographs in editing. You are going to want to make things brighter and darker for sure. Also, there’s plenty latitude for shifting the color here. I mean, who really knows what color sparklers are?
- Experimentation is inevitable and mandatory. Play with your f-stops and shutter speeds to make the picture brighter or darker, but leave the ISO right where it is on 400. The longer the shutter speed the more motion you will capture in your photographs and the more blurry the subjects faces will be. If you like the effect of motion you’re getting but you need to change the brightness change your f-stop. If you want to capture a sharp face you may want to use a shutter speed in the 1 to 2 second range and use a larger aperture—something like F4. There are so many variables here that you just have to play with your settings. But 8 seconds at f8 at ISO 400 is definitely going to get you into the ballpark. If you do a test with those settings and your picture is too bright try four seconds instead of eight seconds. You get the idea.
- If you’re a mosquito repellent person, bring it.

Okay, the answer to the quiz. How did I do it? Anne, my wife, was the sparkler operator here—this would be asking a lot of anybody under the age of 10. It’s one exposure. The question is this: How did the letters not blend together? When I opened the shutter I held a piece of black cardboard in front of the lens. When I said GO, I took the cardboard away from the lens and Anne drew an “I” in space. Then I re-covered the lens with the cardboard while the shutter was still open. Anne then repositioned herself to draw the heart. When I said GO, I removed the cardboard and she drew the heart. When she was finished I re-covered the lens with the shutter still open. Using that method we moved on down the line. I didn’t make her write the letters backwards—that would been a little much. So in the end, I flipped the picture horizontally in Photoshop so you could read it. (The writing was backwards in the original.) This was actually easier than I thought it would be. We did, however, a dry run in our living room which was time well spent. Alexander operated the flashlight so that I could focus on Anne’s face properly. Obviously, the flashlight was off during the exposure.


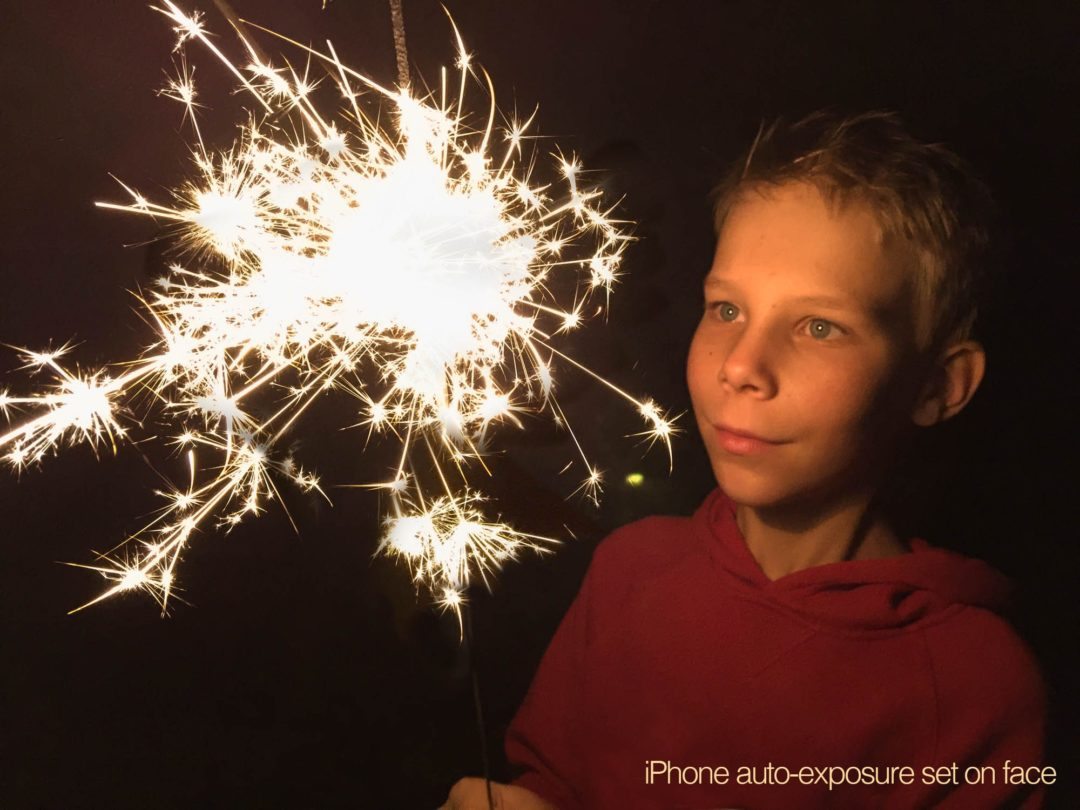
Finally, I went through a couple of boxes of sparklers and four different Manual Exposure camera apps for my iPhone to try and shoot long exposure blurred sparkler pictures. I totally struck out. I’m still in the research and development phase on this one. I did however use the native camera app to shoot this picture of Alexander. I tapped on his face to focus and properly expose for that area of the picture.
![]()

I need lots more practice lol. Never could get their faces to kinda even focus lol. They still had fun.